Wednesday, June 29, 2011

Tequila-Lime Grilled Shrimp

Close your eyes and picture you are sitting on a white sand beach with your toes in the water. While listening to the waves crash around you, you begin to wonder what’s on the menu for tonight? I know I am always in the mood for seafood when I’m on vacation. It’s just seems right. Ok, you can open your eyes now. Unfortunately we aren’t on vacation, but that doesn’t mean we can’t eat like we are! This meal is one you can prepare quickly after a day at work or after a day on the lake. Tonight we are cooking  Bobby Flay's  Recipe for Tequila-Lime Grilled Shrimp. I love his cooking stye because almost everything he cooks is  summer-inspired. Now, pour yourself a margarita and let’s step out back and fire up the grill.

What you will need:
*I doubled the marinade because I used 2 bags of 41-50 count frozen shrimp instead of the larger shrimp (*41-50 count means there are 41-50 shrimp in a pound)
1 cup Tequila
½  cup Lime Juice
1 oz. Freshly Chopped Cilantro
½ Fresh Red Onion (which I left out because this is my least fav. food on the planet!)
Salt & Pepper to taste
12 med. raw Shrimp
Notice I didn't splurge on the tequila...


Combine all marinade ingredients.

Add shrimp and marinate for 30 minutes. It's important not to marinate for more than 30 minutes or the shrimp will begin to 'cook' in the lime juice.

Place shrimp on skewers.

You can see the shrimp are beginning to turn pink from the marinade.

Cook on grill for about 2 minutes on each side. Be careful not to overcook!!!

We had a slight weather delay and ended up having to cook the shrimp inside on my grill pan. I do feel like this may have affected the true summer flavor that only a charcoal grill can provide, but Mother Nature waits for no one!
I do have to say next time I would be sure to use the fresh, larger shrimp. Small shrimp can become over cooked in a matter of 2 minutes, but otherwise, this was so easy! Prep work was minimal and cooking time was a breeze. The lime and cilantro flavors really stood out. Serve this with some steamed veggies and a side salad and you are ready for one fast and fabulous beach inspired meal.

Try it and let us know what you think!
Anna

Monday, June 27, 2011

Summer Sea Scallops


What to cook next?  Lately, I've gotten really bored with my usual supper-time "go-to's" and desperately began searching for something that met several qualifications: A. new and different, B. low-fat but tasty, C. summery (Is that a word??), and D. easy to whip up after a long day at work.
I stumbled upon Bobby Flay's recipe for Grilled Sea Scallops with Avocado-Corn Relish on Crisp Tortillas(say that fast 3 times!) and changed it up a bit to suit me:

Change Number 1:  I have to be honest and say that if I had a gas grill, I would be firing up the grill for this recipe.  I love grilled scallops. LURRVE.  But I only have a charcoal grill, and I'm usually WAY too impatient and hungry by dinner time to wait on the coals to get ready, so I decided to pan-sear them instead.

Change Number 2: Because my little-bitty pocket-size sister is still trying to lose her last few baby weight lbs, I decided to nix the tortilla chips and serve with some veggies instead.

Change Number 3:  Anyone up for some recreational scalloping?  It's supposed to be a banner year!  I would love to go, but unfortunately, I'm not able to break away from my work station long enough to pluck my own fresh scallops out of the Gulf.  Therefore, I plucked my own...right out of the freezer section at the Lanett Kroger.  I'm pretty sure Bobby Flay didn't do this, but what they hey...I bought them frozen and plopped them in the frig over night to thaw...and they were goooooood :)
So, here's my version of Bobby Flay's recipe:

Pan-seared Sea Scallops with Avocado Salsa

Avocado-Corn Salsa:
2 avocado, peeled, pitted and cubed
1 cup roasted corn kernels
3 T. finely diced red onion
1/4 c. coarsely chopped cilantro
1/4 c. fresh lime juice
2 T. sour cream
S&P

Scallops:
2 bags frozen sea scallops
olive oil
S&P

For the salsa:
1. Preheat the oven to 375 degrees.  To roast the corn, I tossed about a tablespoon of olive oil with a cup of frozen corn (b/c believe it or not there was no fresh corn on the cob to be found) and sprinkled it with salt and pepper. I baked it for about 10 minutes until soft and then broiled it for a few to crisp the outside.  Watch carefully.  It won't take long--I almost had burnt pop corn!

2. Dice two avocados.  Click here to learn a really easy way to cut avocado. Here's a pic...

3. Finely dice red onion and chop cilantro.

4.  Squeeze the juice of two small limes on the avocado to prevent it from browning.

5.  Toss in your sour cream.

6.  Once the corn is cool throw it into the party, too.

7.  Stir everything together, and salt and pepper to taste!  Store in the frig until ready to serve.  I actually prepared this the night before, so I could quickly get dinner on the table.

For the scallops:
1.  Pat each scallop dry with a paper towel and salt and pepper both sides.

2.  Heat 3tablespoons of olive oil in a non-stick skillet. 

3.  Place about 5 scallops in the skillet at a time (so as not to overcrowd the pan).  Cook for about three minutes on each side.


That's really all there is to it!  It's so easy, and met and perhaps exceeded all of my expectations.  Try it this summer and you'll feel like you're indulging in a special treat!
Andie

Monday, June 20, 2011

Diet Food Scares Me

I have never been one to stick to a strict diet. You tell me I can’t have bread; I’ll have four rolls. You tell me only chicken; I’ll order a steak. That’s just how it is; however, this week our new mom is steadfast and stable in trying to lose those few extra baby pounds hanging around. I’m proud of her, so I’ll see what I can do about sticking to her” wow,-really-only-chicken-and-greens” strict diet.

After tossing around a few ideas with her all being rejected, we finally found one that we all could enjoy.  Don’t blame it on me if a roll or two finds its way to my table.  It’s very sneaky like that.
I found this recipe years ago in a Better Homes and Gardens magazine.  I was new to recipes, and I would try a different one every night mainly because my parents were still footing the bill. Thankfully, for my wallet, I have gotten out of that stage. I pretty much try to stick to family favorites, wallet friendly meals.  Luckily for me, this one fit this category perfectly.
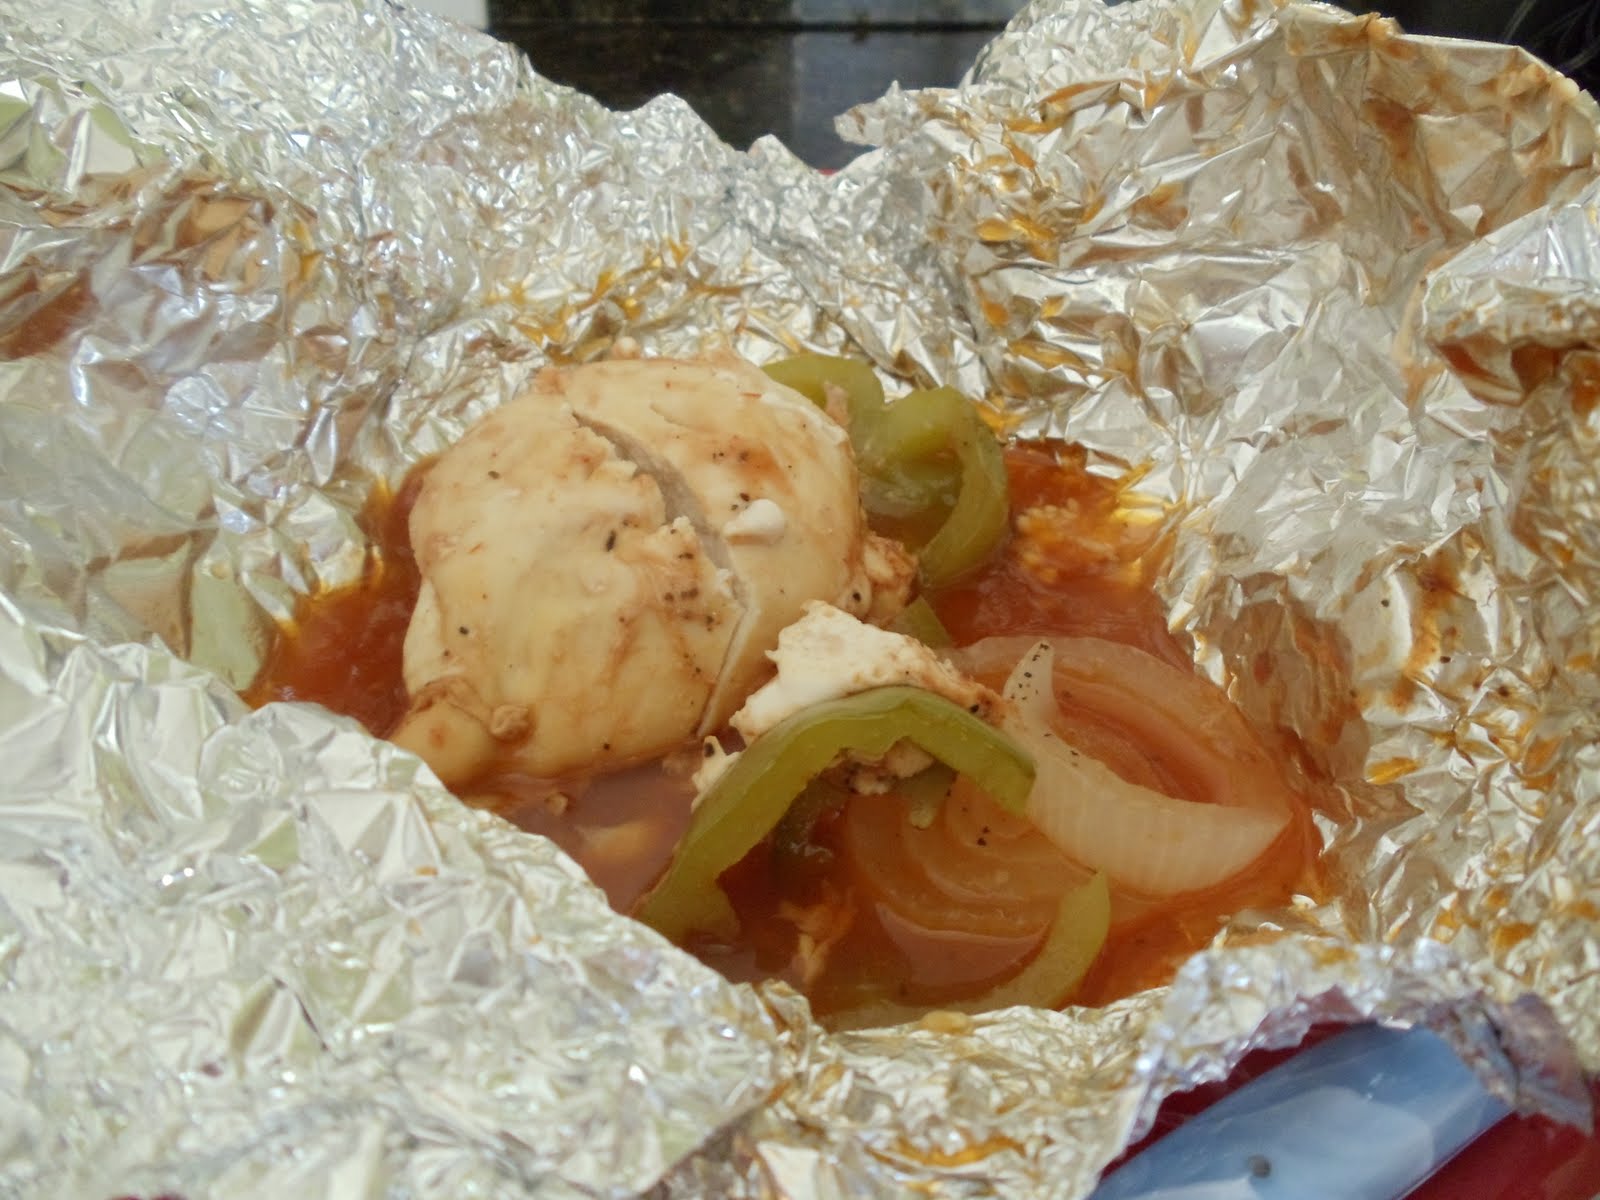
Chicken in a Pocket is on the menu!  I made the name up, because I can’t find the original recipe. Therefore, I am also “winging it”.
Chicken in a Pocket
Chicken breast {I used frozen }
Barbeque sauce
Onion
Margarine
Salt and Pepper
Bell pepper
I also threw in some jalapeno because I have some fresh from my garden
Aluminum foil

You are supposed to slice up some red potatoes to add in it. I left them out only because of diet/price restrictions. Trust me- they are worth adding!
First, take out your aluminum foil and tear off as many pieces of chicken that you are cooking. Make sure they’re large enough to wrap around your chicken and veggies.
Then, chop your veggies.
Spray the bottom with a little PAM
Add the chicken
Cover with BBQ sauce
Add your opinion, bell pepper, jalapeno, S&P and a few pats of margarine
Wrap it up nicely
Continue until all are wrapped and ready to go, and
place on a cookie sheet because some of them may leak.
Bake around 425 for about 40 minutes.
I served this with rice and zucchini and squash straight from the garden, and it was delicious; a perfect summer meal. This creates a delicious sauce that goes great on top of the rice.
Can you believe no rolls were harmed during this meal? I can't, but we didn't even miss them...almost! :)
Happy cooking! Kirby

Wednesday, June 15, 2011

Eggplant Parmesan AKA Chicken Parmesan CopyCat


Following suit of my other two bloggers, one of my biggest tasks for the past month has been to drop a few "LB"s before **yikes! hide! suck it in!** bathing suit season.  My family has been on the "17 Day Diet" kick for--well--quite a few more days than 17.  As a result, we have all decreased our waist lines and increased our confidence, which should bode well for us during **shriek! gasp! panic!**  bathing suit season.

One recipe that we discovered in the diet book was one for eggplant parmigiana.  I've never really been comfortable cooking eggplant, though i do think the color is exquisite :)  However, after eating all I could stand of steamed veggies and baked/grilled chicken breast, we decided to give this recipe a whirl.  We all agreed that it definitely hits its mark in leaving you pushing away from the table both full AND satisfied, and we've since used this recipe about five times. 

**Side Note:  Anna's blog for chicken parmesan is a play on this recipe.  I thought I'd go ahead and post this one (even though it's very similar to hers), because it's a really good recipe!

The recipe is quite simple, with few ingredients.  The only drawback is that the eggplant in this dish is a little like me in that it requires a bit of attention.  But I guarantee it's TOTALLY worth it in the end for a healthy, yet delicious dish.

1 large eggplant, sliced
4 egg whites
1-2 cups low-fat parmesan cheese
garlic poweder, to taste
1 cup low-carb marinara sauce

Preheat oven to 400 degrees. Spray baking sheet with Pam. 

1. Cut eggplant into 1/4 inch (or thinner if you like crispier) slices. 
                                         

2. In a shallow dish, beat egg whites and 4T. of water until foamy. 

3. Place parmesan cheese in bowl.  Dip eggplant slices into eggwhites, then into parmesan cheese, pressing cheese into eggplant. 

4. Place eggplant on baking sheet and sprinkle with garlic powder. 

5. Spray tops of eggplant with Pam. 
Try not to be jealous of my sweet baking sheet, ok?

Bake for 20 minutes until tops are golden brown.  Turn eggplant over and cook for 10 minutes.  After 10 minutes,  cover eggplant slices with marinara sauce.  Bake for an additional 20 minutes, or until sauce is bubbly. 

Now, the recipe is for two servings.  However, this makes A LOT of food.  If you plan to share this with only one other person, a side salad to go along with it will do for a filling meal.  I think you'll love it if you give it a shot!
--Andie


Saturday, June 11, 2011

Chicken Parmesan

About 10 weeks after my sweet angel was born, I realized that all that extra baby weight was not just going to melt off. Once I opened my eyes to this, I decided it was time for me to find a way to drop the last 15lbs. I started using the 17 Day Diet for my battle of the bulge. I am now starting on day 4, and have already lost 3 ½ lbs! This is just the encouragement I need to make it through this first phase. The old age questions stands, ‘What can you eat on this diet?’. I won’t go into all the details about the diet, but here is one delicious recipe you can make at home. It’s a classic Italian recipe that can be adapted to any meat or veggie you would like to use.

I wanted to be able to make something for my husband and have him actually look forward to dinner and not feel like this is another ‘diet’ meal. This recipe was originally for Eggplant Parmesan, which I have had and it is delicious. However, the hubs isn’t too keen on Eggplant. Ding Ding!!! Chicken Parmesan is one of his favorites. I just knew I could make this good for him and good for my diet for me.

Let’s get cooking!


Here’s what you will need:
Boneless/Skinless Chicken Breast
Egg Whites
Low Fat/Fat Free Parmesan Cheese
Italian Seasoning
2 Tbsp Olive Oil (**This diet allows you to have up to 2 Tbsp Olive Oil each day. I figure I may need to add a little to the skillet throughout the cooking, but each breast will not be coated in that much oil.)


This is all you will need for this recipe (plus 2 egg whites)

Start off by heating your oil in a nonstick skillet over medium heat.
Pound out your chicken to about ½in thick. This will help them to cook fast and even.
Pat the chicken dry.
In a bowl for dredging, mix the parmesan cheese and Italian seasoning.
Dip into Egg White and then into the parmesan cheese mixture.
Place in the skillet and cook for about 5 min on each side or until chicken is golden brown and cooked through.


Once it's cooked through, add a little warm Light Marinara Sauce over the top. You will never know this isn't deep fried and covered in bread crumbs like you are used to.


For a few more calories, cook a little pasta and place in the bottom of a casserole dish. Top with chicken, marinara, and a little mozzarella. Place under the broiler until cheese is browned. Here's what you'll get:


To be honest with you, I wasn’t super excited about starting this diet. However, I have found some really great recipes and have really enjoyed expanding my horizons in the kitchen. This method of cooking by coating the food in Fat Free Parmesan cheese has really made it easy to have something for dinner that isn’t the same old thing. This is a delicious way to cook fish, too. Just leave out the Italian Seasoning and add a little Paprika. There are so many options out there, so get out there and cook!

Anna

Tuesday, May 24, 2011

Take Me Out

I love baseball season; I always have.  I guess you could say it’s my sport.  It’s the one game that I actually know what’s going on, and can somewhat carry on a conversation about.  I first came up with this idea when in college and was part of the “Diamond Dolls”.  I have made these cookie sandwiches at Christmas and used sprinkles on top before, but it hit me during baseball season that these were the perfect shape and color and with just a little something special they can easily become bona fide baseballs!
These are some of the easiest no bake, cutest baseball cookies you will ever come across.  Maybe I’m biased?  They take a few extra minutes because you have to wait for each step to dry or melt completely, but they are so worth it!  I made these last night for Stephen’s summer ball baseball team.  I hope they enjoy them as much as I enjoyed making them!
Your ingredients are simple:
·         Ritz crackers
·         Peanut butter
·         Almond Bark
·         Food color pen


First, pull out your almond bark.  What is almond bark you ask?  It’s vanilla or chocolate flavored candy coating. You can read about it here.  For this example, you will need vanilla flavored.  It’s delicious.  Don’t be afraid of this stuff.  If you don’t know where almond bark is, it’s in the baking aisle right next to the chocolates. Tip: It melts very easily, so don’t leave it in your car during 90 degree weather. Just saying.
Pull it out of the fridge, if you did leave said almond bark in the car and it melted, to bring to room temperature.  If not, it should already be at room temp.  Get to breaking it up. I did this with a large knife and shaved off pieces. This may be the hardest step, but it’s not really hard just time consuming. Count this as your daily arm workout.
Now we must create a double boiler if you are like me and don’t own one, but I bet you do have two varying sized pots!  This technique is not suggested or correct or anything you will ever see, but it has never let me down. I add some water to one pot and turn on low, and insert the other pot right in it.

Technically the water is not supposed to touch the second pot, but again, it works for me. Just be careful not to let the water boil and stir constantly.  I hear that it’s extremely easy to do this step in the microwave, but I am a creature of habit and the first works for me, so why change?  While your almond bark melts (you can take the smaller pot out of first periodically if you need to do something else) build your cracker sandwiches. 

I used two complete sleeves and one full block, and it was just enough.  Once the almond bark was completely melted I removed from larger pot and set it on a dish towel. Then, placed one sandwich in, flipped to coat and removed.

This step needs to happen fast because the peanut butter will melt out. I used a spatula in the left hand and tongs in the right. Flip with the left; insert and take out with the right. You get the picture.  You’ll figure out your own technique, and it’ll go very quickly. Once all your sandwiches have been dipped, let dry completely. 
At this stage, pull out your Betty Crocker Food Decorator pens. They work the best. It’s like food coloring in marker form.  They’re great! You will need red for this.  Now place little X’s in a backward parenthesis shape, and voila! You instantly have delicious, beautiful baseballs!


Let’s play ball, and Go White Sox! Kirby

Wednesday, April 27, 2011

A lot has happened since I started working on this particular post. We talk in just about every post about prepping your ingredients ahead. Well, I did just that. Wednesday night, I prepared my patties, so on Thursday I would just have to fire up the grill to get dinner going. Little did I know, that was not going to happen. I went into labor that night and our new addition arrived Thursday afternoon around noon. Since the burgers were already made, we grilled them the day I came home from the hospital.  I have since been a little sidetracked, but I’m back and trying to get caught up. I have posted a picture of our newest little blogger at the end. Enjoy…
Backyard Burgers
 There’s the smell of fresh cut grass in the air, the flowers are starting to bloom, and after a long winter, we all have the urge to break out the shorts and flip flips and get outside to grill! When you want to have a few friends over for an easy dinner, nothing beats a backyard burger. However, this post, we are going to put a little spin on things.
Because we are all still trying to hold on to those New Year’s resolutions, Lenten promises, or just trying to get in shape for the upcoming bathing suit season we are going to lighten up the typical backyard burger. We are having turkey burgers! Before you run away screaming about the horrors of diet food, stick around and give this one a chance. This recipe is from the Cooking Light magazine, July 2010. I LOVE this magazine. If you have never flipped through, I highly recommend it. You can find pretty much any recipe you desire in the pages of this magazine. The best part is that they have done all the work and lightened up the recipe. Double win!
This recipe in particular has a secret ingredient I will reveal towards the end. It promises to help the burgers taste more like the traditional beef we are used to. Stay tuned and see how they turn out.

Make your patties the night before and keep them in the fridge for a time-saver!
Light your grill and give it about 30-40 minutes until all the coals are white. This will ensure there is a pretty consistent temperature in the grill and also help prevent flame-ups.
While your grill is coming to temperature, mix together your ingredients and form large, loose patties. Try to handle them as little as possible. This helps to keep the meat tender. I tend to make my patties bigger and a little thinner than you would think. They tend to shrink up on the grill. If you don’t take this into account, you’ll end up with tasty little meatballs. We will soon find out if turkey shrinks like beef. Since turkey is so low in fat, we are going to lightly spray each side with a non-stick cooking spray so they don’t stick to the grill. (Note: Turkey does not shrink like beef on the grill.)


ALERT: Please, please, please, resist the urge to smash your burgers with the back of the spatula. This does not make your burger cook quicker. It can cause your burger to be dry and tough. Also, try to resist constant flipping. It is best to flip once during cooking.
For this particular burger, place on grill and let cook for about 4 minutes. Flip and cook for about 3 minutes on second side or until they are cooked through.
The burgers were very tasty; however, they did NOT taste like beef. They were full of flavor and I would definitely make them again. Are you ready for the secret ingredient? Roasted eggplant!  You roast it whole in the oven, puree, and mix in with the meat. It helps to hold it together while giving it added flavor and nutrients. Even if you think you don’t like eggplant, just try it. You won’t even know it’s there.  This recipe also calls for an ingredient called Marmite. I am not familiar with it and our local grocery stores do not carry it. Because it only called for ¼ teaspoon, I just left it out. I feel like the burgers were still very tasty.


This is what your roasted eggplant will look like.


Pureed Roasted Eggplant

**A burger is the perfect vehicle for many vegetables and condiments. My husband prefers the mushroom/swiss version.
**Sometimes when I have a little extra time on my hands, I make super thin patties; place a piece of cheese in the middle and top with another patty. Seal the edges and voila! Instant cheeseburger surprise.
Get out there and be creative with your toppings. Let us know which are your favorites!
-Anna

Our newest little blogger, Wade