Tuesday, August 16, 2011

C'est la Vie!!

The girls and I had a few guests for dinner...we do love a party!  Upon the request of one of our guests, we decided to have a French meal. Oui oui! {envision French man with beret, mustache and big gestures.} 

Anna signed up to make Coq au vin (pronounced coke-o-van), a traditional French dish of braised chicken in a red wine sauce.  The preparation of coq au vin is very similar to that of beef bourguignon, which Kirby showed us how to make back in February.  You can find the link by clicking here.
Kirby found a recipe for Parisian potatoes (pommes parisienne) to bring to the party.  These potatoes are different from the many varieties of which we've become accustomed (baked, mashed, french fried, scalloped, potato salad, etc. ...do i sound like Bubba on Forrest Gump?).  These potatoes are in little balls, thanks to the use of a melon baller.

I opted for chocolate mousse for dessert and used the mousse portion of Anna's Six Layer Dreamy Chocolate Mousse Cake.  Click the link to see the recipe. I kid you not it took me less than five minutes to whip up this rich dessert.  I did it the night before, so all I had to do the day of the party was serve it up in cute martini glasses and top with some whipped cream I had left over!

Ok...so this was an overview of our planned meal.  Now I'll let the others give their recipes and explain what happens when the power goes out a couple hours before the party and doesn't come back on until 3 minutes before our guests arrive.  The meal was great...but maybe not very French.  Let's call it dinner with a hint of French cooking :)
--Andie

Anna's Coq Au Vin:
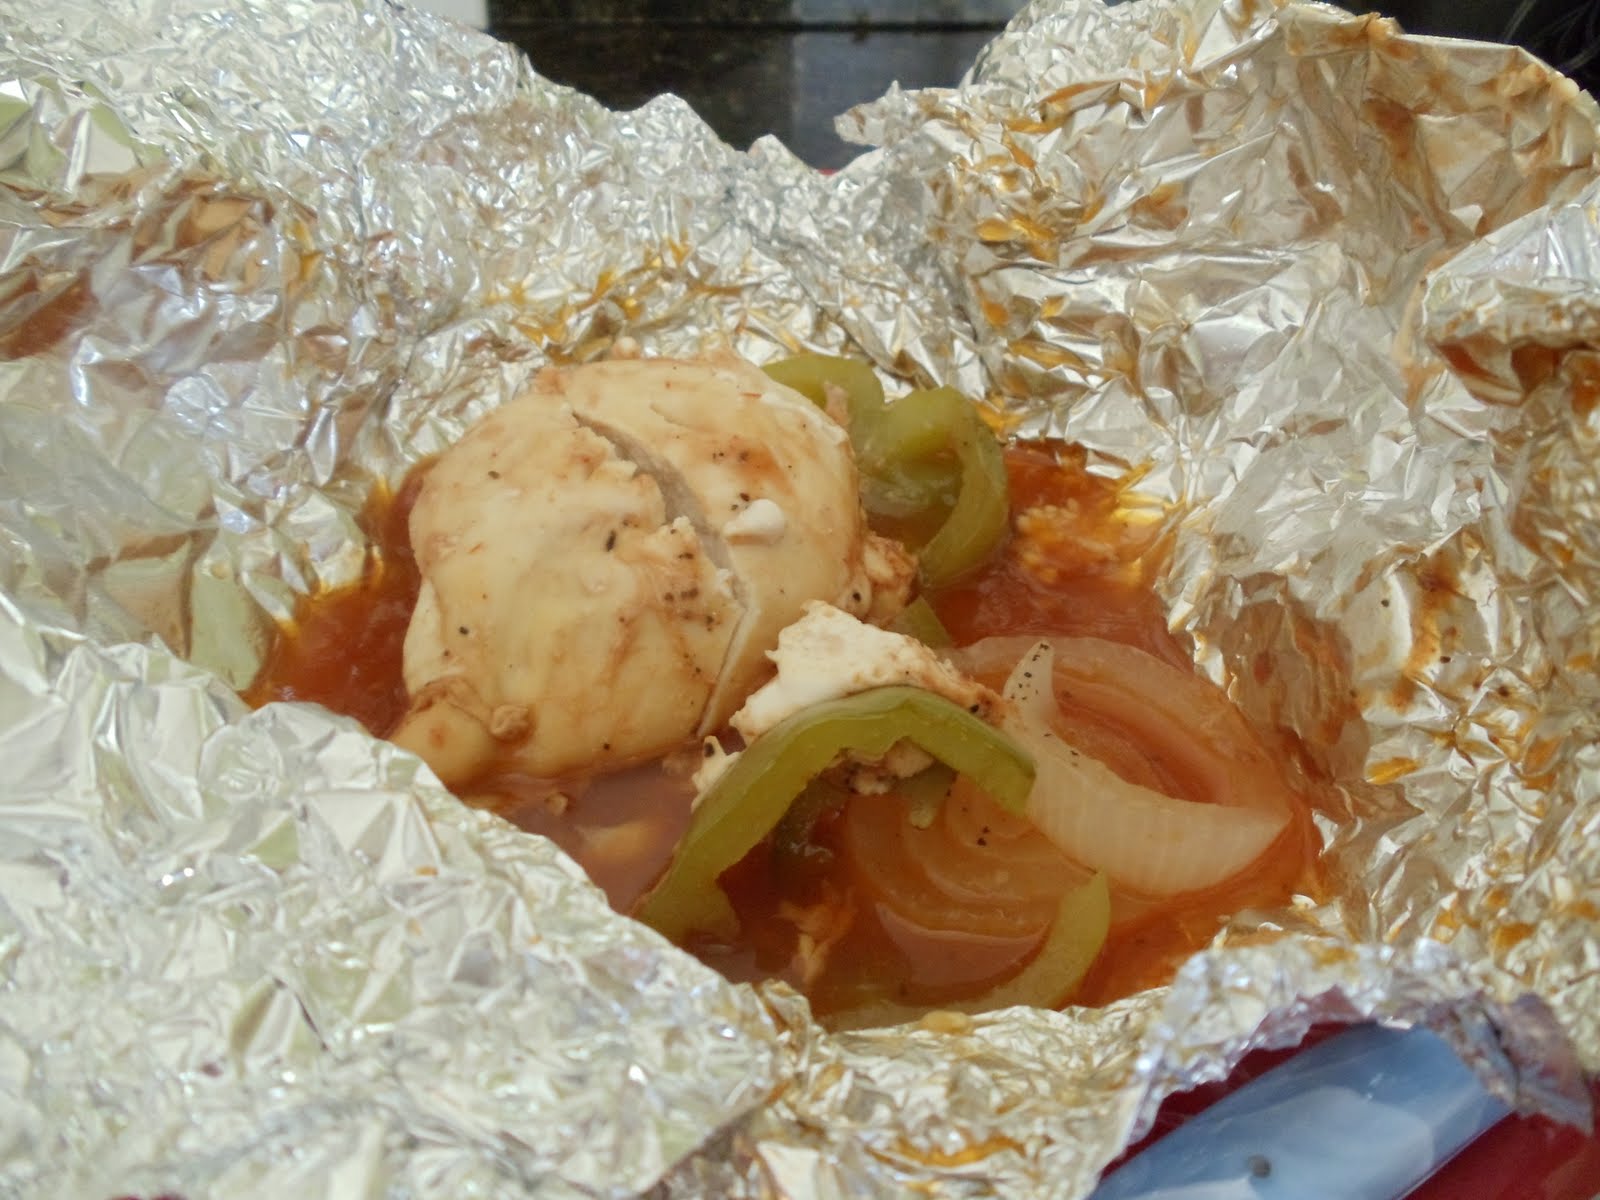
I was so pumped about this dish. I had all my ingredients prepped and the chicken had been marinating in red wine over-night. We had a classic Southern summer rain storm come through about lunch time. I returned home to no power. No prob! Alabama Power says power should be restored by 3:30, which is perfect since my dish has to cook for 2 hours. While waiting on the power to return, I prepped all my ingredients and re-read the recipe so I would be able to rock and roll at 3:30. Well, 3:30 came and went.  I was in a slight panic by 5:00 when there was still nothing. I considered just calling off the whole sha-bang when I stopped to think that we could make this work. All me needed was a grill and some aluminum foil. The hubs fired up the grill for us. We packaged up all the veggied into foil packets and cooked them along side the chicken. Although, this is not our traditional coq au vin, it's the best we could do. The meal turned out fabulous, although not French. But, if we were in France and the power went out this is what we would do, so I guess you could call it a French BBQ'ed Coq Au Vin!
Click here to see the full Coq Au Vin recipe.

Kirby's Parisian Potatoes:
I was so excited to try this new process of making potatoes. It seemed so easy, and that was what I was most excited about. I knew it would be a recipe that I could re-create numerous times in my home when we aren't having a "French Dinner".  You'll need a melon baller for this, and you use it to cut out the potato. Then, place in a pot of cold water and bring to a boil. Boil for four minutes. Then, melt your butter and some oil (and salt and pepper) in a pan and toss to coat. Lastly, you place them in oven for about 25-30 minutes. And, Voila! They're ready! Sounds easy and yummy, right? I'll let you know how they turn out next time!
Click here to see the full Parisian Potatoes recipe.


Here's the final product!!

This dessert was to-die for!!

Considering our we were all having a panic attack about 5pm, everything pulled together nicely. We had a nice grilled meal with great company and even better sangria (thanks Lucy!!). Maybe next time we will actually be able to fulfill their request for dinner. When life hands you lemons, make lemonade!

-Andie, Anna, & Kirby 

Wednesday, August 3, 2011

Pizza - fied Chicken

I know it's hard to stay on the straight and narrow when trying to eat healthy. I am generally one that believes none of these count when dieting: eating standing over the sink, anything taken from other people's plates, and anything you eat when noone is watching. My conscious reminds me that they all indeed count, but unfortunately, it is almost always too late. I have already indulged in something that is a no-no. One of the hardest things to avoid when watching your waistline is pizza. Its so hard to say no to because it's pretty much on everyones list of favorite foods and because it is so easy to just pick up a $5 Hot-n-Ready on your way home.

Believe it or not, I have found a recipe that will give you the pizza fix we all need without making you feel guilty.This recipe comes from Hungry Girl, Lisa Lillien. Her cookbook and website have both been a regular go-to for me. She has recently expanded and has a show on Food Network. She knows how to take foods that we all know and love and turn them into something healthy we can love just as much. This particular recipe is for Pizza-fied Chicken. Trust me...this is delish!

http://www.foodnetwork.com/recipes/pizza-fied-chicken-recipe/index.html
http://www.hungry-girl.com/show/you-wanna-pizza-me-pizza-fied-chicken-recipe

You will need:

5oz. Chicken Breast
1/4 Cup Bell Pepper, chopped
1/4 Cup Onion, chopped (I omitted because I think we all know how I feel about onions)
1/4 Cup Sliced Mushrooms (I used canned this time, but recommend fresh)
1/4  Cup Crushed Tomatoes
4 Turkey Pepperoni, chopped (these are just as good as the original, just less greasy)
Low-Fat String Cheese
Garlic Powder
Onion Powder
Salt & Pepper
Parmesan Cheese

**NOTE: The quantities of these ingredients is to top one chicken breast. Adjust quantites accordingly. I didn't realize this at first and used this for all 3 chicken breasts, and it was still plenty. Just use your discretion.

Pound out your chicken breast to 1/4-1/2 inch thickness. Season with onion powder, garlic powder, salt, and pepper and set aside.


Season the tomatoes with onion powder, garlic powder, salt, and pepper and set aside.

Now, the original recipe says to use 2 nonstick skillets. One to cook the veggies and one to cook the chicken. It's totally up to you how many dishes you want to dirty. If you opt to just use one, cook the veggies until soft and set aside, Then cook the chicken.

Spray the skillet and cook chicken over med-high heat until cooked through. About 3-4 minutes on each side. When the chicken is done, spoon the tomato sauce on top of the chicken.

Tear or cut the string cheese into small pieces and add to the chicken.

Top with veggie mixture and pepperoni.

Cover and cook for 1-2 minutes or until cheese is melted.

Top with parmesan cheese (and crushed red pepper if you are feeling frisky) and enjoy!


I thought this was awesome! The chicken was tender and the topping was truly a pizza party in my mouth. I think this is definitely worth a try. You'll be surprised how yummy this is, and you can add any pizza toppings you like (i.e.sliced black/green olives, pepperoncini, etc. ) to make it your own. Give it a try, and let us know what you think.

Anna

Friday, July 29, 2011

Chicken Cordon Bleu

This classic American novelty is believed to have originated in the 1960’s and is French for ‘Blue Ribbon’.  The beauty of a recipe like this is the potential you have to truly make it your own. You could use chicken or veal as the main meat and stuff with any type of cheese you want.  I LOVE a recipe like this because I can try many variations and my husband doesn’t realize we are essentially having the same thing for dinner a couple nights a week.
When I hear ‘Chicken Cordon Bleu’, the first thing that comes to mind for me is the frozen chicken you find somewhere like Sam’s. That is how I first experienced Chicken Cordon Bleu. Little did I know that as delicious as this was, it was (eek!!) FULL of fat (see below) and really only half as good as it has the potential to be.

I have managed to put a twist on a recipe I found to make this much lower in fat than its counterpart. It’s easy, delicious, and my hubby has requested it to be added to our regular dinner rotation (that’s really saying something!).
Here’s what you’ll need:
Chicken Breast
Swiss Cheese (I used the sandwich slices)
Deli Ham
Low Fat Parmesan Cheese (instead of breadcrumbs)
Italian Seasoning
Sauce:

1 Can Fat Free Cream of Chicken Soup
1/2 Cup Fat Free Sour Cream
1Tbsp. Lemon Juice
Pound out your chicken until it is about 1/4 inch thick. Season both sides with salt and pepper.

See how big?! This makes it cook evenly and easy to roll.
  Place half a piece of cheese in the middle of the chicken. Place a couple of slices of ham on top and then add the other half of the cheese.

Tightly roll and secure with a few toothpicks.

Mix some Italian seasoning with the parmesan cheese and...

coat each chicken breast.

Place in a cooking dish, seam side down and bake at 350 degrees for 30-35 minutes or until chicken is no longer pink. While the chicken is cooking, you can prepare the sauce. Combine the ingredients in a saucepan and heat through.

Easy, huh? This sauce is totally optional, but is a good addition to the meal. If you are making rice as a side dish, this is a great topper for that as well.
Here’s where you can mix it up a little…
Remove from oven and spray with cooking spray to brown the top or top with a little more cheese. Place under the broiler until desired doneness is reached.
 
Wow! I can't wait to dig in!

The cheese is so ooey gooey, you won't believe how yummy it is!

Prep, prep, prep…This is a good recipe to make in advance. You can roll up the chicken the night before, and coat the chicken with the parmesan cheese right before time to cook. I hope this twist on a classic will inspire some of you followers to try something new. Let us know how it turns out!
Anna

Friday, July 8, 2011

No Bake Peach Pie

This week has been crazy, but crazy good! Stephen’s baseball team just won their district tournament, and they are heading to state! With that being said, I haven’t had time to cook. I haven’t had time to gather with my other blogger buddies, but I was able to find a few minutes to make this recipe. That is how quick and easy it is to whip up. Even if you are having one of those hazy, crazy days of summer, you still have time to make a sweet dessert for your family or friends.
It’s July, and it is hot.  Who wants to turn the oven on this time of year? It just causes your air conditioner to have to work overtime; therefore, you will have a higher power bill.  A perfect excuse for you to make this pie!  This pie was the easiest treat I have ever made, and it is delicious. It didn’t hurt that I had fresh from the orchard peaches on hand.  My mom and granddaddy go every summer (twice for different varieties) to pick up fresh peaches from a local peach farm.  So when they went this year, I knew that I would have to make something using them.  A cobbler came to mind first, but I feel like we as Southerners get the chance to eat those at just about every single family gathering, at mine anyway.  I wanted to try something different, and boy, did it pay off!

I ran across this recipe after searching what felt like hours.  It’s from a blog called Sprouted Kitchen, and she calls her recipe Peach Cream with Gingersnap Crust.  Yum.  She had me at peach cream.  I’m sure the gingersnap crust would be delicious in this recipe, but I don’t own a food processor. Apparently no one in my immediate family does either, so I opted to use a store made graham cracker crust. I’m not disappointed.
The ingredients list is short and sweet. 1 14 oz can of sweetened condensed milk She suggests using low-fat. I don’t.  ½ cup of crème fraiche I used sour cream. You can also use a plain yogurt. Both work as its substitute. ¼ cup of lemon juice I used one whole lemon, and it wasn’t quite enough, but it didn’t hurt anything. 1 Tbsp of cinnamon This ingredient scared me. It looked like a lot of cinnamon. Lastly, 1 ¼ cups of fresh peaches, peeled and diced.
1 14 oz can of sweetened condensed milk 
½ cup of crème fraiche
¼ cup of lemon juice
1 Tbsp of cinnamon
1 ¼ cups of fresh peaches, peeled and diced

First you will need to peel and chop your peaches. Peeling and chopping peaches is a dirty job. I suggest doing this near a sink.  Next, you have to figure out how many peaches equal 1 ¼ cup. I peeled five peaches, but one was probably consumed during this experiment.  Four peaches should do the trick depending on their size. Chop them into tiny pieces and give them a good squeeze in your hand before dropping them in your mixing bowl. This helps to break them up and get a little juice in the mix.  Then pour your can of sweetened condensed milk in as well as your sour cream.  Next, goes your lemon juice. You could always use the pre-juiced lemon juice (does that even make sense??). You know the kind in the little plastic lemon.

Lastly, add your cinnamon.  Stir all ingredients together very well.  I used a spatula and was kind of rough in order to break up the peaches a little more. After a few minutes of stirring, I still found pockets of cinnamon. That doesn’t sound like good eats to me. (Did Alton Brown trademark that?)


After it comes together, pour the mixture into your pie crust. Place in the refrigerator to set for four hours.  The author of this recipe even suggests placing it in the freezer, then letting it sit a few minutes before serving.  Four hours is key.  The lemon juice reacts with the milk which makes the pie firm.  I could not wait four hours, so I tried it after about two. It was a little runny, but that will be the last thing on your mind! I was tempted to lick the plate, so maybe the runny-ness isn’t such a bad thing?

Next time, I may not add quite as much cinnamon, and one day I will attempt the gingersnap cookie crust.  Regardless, I think it was a homerun!

Happy summer! Kirby

Gingersnap Cookie Crust
10 oz. Gingersnap Cookies
3 Tbsp. Butter
In a food processor, grind together the cookies. While pulsing, add the butter. Press into a pie plate and let firm in the freezer.

Wednesday, June 29, 2011

Tequila-Lime Grilled Shrimp

Close your eyes and picture you are sitting on a white sand beach with your toes in the water. While listening to the waves crash around you, you begin to wonder what’s on the menu for tonight? I know I am always in the mood for seafood when I’m on vacation. It’s just seems right. Ok, you can open your eyes now. Unfortunately we aren’t on vacation, but that doesn’t mean we can’t eat like we are! This meal is one you can prepare quickly after a day at work or after a day on the lake. Tonight we are cooking  Bobby Flay's  Recipe for Tequila-Lime Grilled Shrimp. I love his cooking stye because almost everything he cooks is  summer-inspired. Now, pour yourself a margarita and let’s step out back and fire up the grill.

What you will need:
*I doubled the marinade because I used 2 bags of 41-50 count frozen shrimp instead of the larger shrimp (*41-50 count means there are 41-50 shrimp in a pound)
1 cup Tequila
½  cup Lime Juice
1 oz. Freshly Chopped Cilantro
½ Fresh Red Onion (which I left out because this is my least fav. food on the planet!)
Salt & Pepper to taste
12 med. raw Shrimp
Notice I didn't splurge on the tequila...


Combine all marinade ingredients.

Add shrimp and marinate for 30 minutes. It's important not to marinate for more than 30 minutes or the shrimp will begin to 'cook' in the lime juice.

Place shrimp on skewers.

You can see the shrimp are beginning to turn pink from the marinade.

Cook on grill for about 2 minutes on each side. Be careful not to overcook!!!

We had a slight weather delay and ended up having to cook the shrimp inside on my grill pan. I do feel like this may have affected the true summer flavor that only a charcoal grill can provide, but Mother Nature waits for no one!
I do have to say next time I would be sure to use the fresh, larger shrimp. Small shrimp can become over cooked in a matter of 2 minutes, but otherwise, this was so easy! Prep work was minimal and cooking time was a breeze. The lime and cilantro flavors really stood out. Serve this with some steamed veggies and a side salad and you are ready for one fast and fabulous beach inspired meal.

Try it and let us know what you think!
Anna

Monday, June 27, 2011

Summer Sea Scallops


What to cook next?  Lately, I've gotten really bored with my usual supper-time "go-to's" and desperately began searching for something that met several qualifications: A. new and different, B. low-fat but tasty, C. summery (Is that a word??), and D. easy to whip up after a long day at work.
I stumbled upon Bobby Flay's recipe for Grilled Sea Scallops with Avocado-Corn Relish on Crisp Tortillas(say that fast 3 times!) and changed it up a bit to suit me:

Change Number 1:  I have to be honest and say that if I had a gas grill, I would be firing up the grill for this recipe.  I love grilled scallops. LURRVE.  But I only have a charcoal grill, and I'm usually WAY too impatient and hungry by dinner time to wait on the coals to get ready, so I decided to pan-sear them instead.

Change Number 2: Because my little-bitty pocket-size sister is still trying to lose her last few baby weight lbs, I decided to nix the tortilla chips and serve with some veggies instead.

Change Number 3:  Anyone up for some recreational scalloping?  It's supposed to be a banner year!  I would love to go, but unfortunately, I'm not able to break away from my work station long enough to pluck my own fresh scallops out of the Gulf.  Therefore, I plucked my own...right out of the freezer section at the Lanett Kroger.  I'm pretty sure Bobby Flay didn't do this, but what they hey...I bought them frozen and plopped them in the frig over night to thaw...and they were goooooood :)
So, here's my version of Bobby Flay's recipe:

Pan-seared Sea Scallops with Avocado Salsa

Avocado-Corn Salsa:
2 avocado, peeled, pitted and cubed
1 cup roasted corn kernels
3 T. finely diced red onion
1/4 c. coarsely chopped cilantro
1/4 c. fresh lime juice
2 T. sour cream
S&P

Scallops:
2 bags frozen sea scallops
olive oil
S&P

For the salsa:
1. Preheat the oven to 375 degrees.  To roast the corn, I tossed about a tablespoon of olive oil with a cup of frozen corn (b/c believe it or not there was no fresh corn on the cob to be found) and sprinkled it with salt and pepper. I baked it for about 10 minutes until soft and then broiled it for a few to crisp the outside.  Watch carefully.  It won't take long--I almost had burnt pop corn!

2. Dice two avocados.  Click here to learn a really easy way to cut avocado. Here's a pic...

3. Finely dice red onion and chop cilantro.

4.  Squeeze the juice of two small limes on the avocado to prevent it from browning.

5.  Toss in your sour cream.

6.  Once the corn is cool throw it into the party, too.

7.  Stir everything together, and salt and pepper to taste!  Store in the frig until ready to serve.  I actually prepared this the night before, so I could quickly get dinner on the table.

For the scallops:
1.  Pat each scallop dry with a paper towel and salt and pepper both sides.

2.  Heat 3tablespoons of olive oil in a non-stick skillet. 

3.  Place about 5 scallops in the skillet at a time (so as not to overcrowd the pan).  Cook for about three minutes on each side.


That's really all there is to it!  It's so easy, and met and perhaps exceeded all of my expectations.  Try it this summer and you'll feel like you're indulging in a special treat!
Andie

Monday, June 20, 2011

Diet Food Scares Me

I have never been one to stick to a strict diet. You tell me I can’t have bread; I’ll have four rolls. You tell me only chicken; I’ll order a steak. That’s just how it is; however, this week our new mom is steadfast and stable in trying to lose those few extra baby pounds hanging around. I’m proud of her, so I’ll see what I can do about sticking to her” wow,-really-only-chicken-and-greens” strict diet.

After tossing around a few ideas with her all being rejected, we finally found one that we all could enjoy.  Don’t blame it on me if a roll or two finds its way to my table.  It’s very sneaky like that.
I found this recipe years ago in a Better Homes and Gardens magazine.  I was new to recipes, and I would try a different one every night mainly because my parents were still footing the bill. Thankfully, for my wallet, I have gotten out of that stage. I pretty much try to stick to family favorites, wallet friendly meals.  Luckily for me, this one fit this category perfectly.
Chicken in a Pocket is on the menu!  I made the name up, because I can’t find the original recipe. Therefore, I am also “winging it”.
Chicken in a Pocket
Chicken breast {I used frozen }
Barbeque sauce
Onion
Margarine
Salt and Pepper
Bell pepper
I also threw in some jalapeno because I have some fresh from my garden
Aluminum foil

You are supposed to slice up some red potatoes to add in it. I left them out only because of diet/price restrictions. Trust me- they are worth adding!
First, take out your aluminum foil and tear off as many pieces of chicken that you are cooking. Make sure they’re large enough to wrap around your chicken and veggies.
Then, chop your veggies.
Spray the bottom with a little PAM
Add the chicken
Cover with BBQ sauce
Add your opinion, bell pepper, jalapeno, S&P and a few pats of margarine
Wrap it up nicely
Continue until all are wrapped and ready to go, and
place on a cookie sheet because some of them may leak.
Bake around 425 for about 40 minutes.
I served this with rice and zucchini and squash straight from the garden, and it was delicious; a perfect summer meal. This creates a delicious sauce that goes great on top of the rice.
Can you believe no rolls were harmed during this meal? I can't, but we didn't even miss them...almost! :)
Happy cooking! Kirby