Tuesday, May 24, 2011

Take Me Out

I love baseball season; I always have.  I guess you could say it’s my sport.  It’s the one game that I actually know what’s going on, and can somewhat carry on a conversation about.  I first came up with this idea when in college and was part of the “Diamond Dolls”.  I have made these cookie sandwiches at Christmas and used sprinkles on top before, but it hit me during baseball season that these were the perfect shape and color and with just a little something special they can easily become bona fide baseballs!
These are some of the easiest no bake, cutest baseball cookies you will ever come across.  Maybe I’m biased?  They take a few extra minutes because you have to wait for each step to dry or melt completely, but they are so worth it!  I made these last night for Stephen’s summer ball baseball team.  I hope they enjoy them as much as I enjoyed making them!
Your ingredients are simple:
·         Ritz crackers
·         Peanut butter
·         Almond Bark
·         Food color pen


First, pull out your almond bark.  What is almond bark you ask?  It’s vanilla or chocolate flavored candy coating. You can read about it here.  For this example, you will need vanilla flavored.  It’s delicious.  Don’t be afraid of this stuff.  If you don’t know where almond bark is, it’s in the baking aisle right next to the chocolates. Tip: It melts very easily, so don’t leave it in your car during 90 degree weather. Just saying.
Pull it out of the fridge, if you did leave said almond bark in the car and it melted, to bring to room temperature.  If not, it should already be at room temp.  Get to breaking it up. I did this with a large knife and shaved off pieces. This may be the hardest step, but it’s not really hard just time consuming. Count this as your daily arm workout.
Now we must create a double boiler if you are like me and don’t own one, but I bet you do have two varying sized pots!  This technique is not suggested or correct or anything you will ever see, but it has never let me down. I add some water to one pot and turn on low, and insert the other pot right in it.

Technically the water is not supposed to touch the second pot, but again, it works for me. Just be careful not to let the water boil and stir constantly.  I hear that it’s extremely easy to do this step in the microwave, but I am a creature of habit and the first works for me, so why change?  While your almond bark melts (you can take the smaller pot out of first periodically if you need to do something else) build your cracker sandwiches. 

I used two complete sleeves and one full block, and it was just enough.  Once the almond bark was completely melted I removed from larger pot and set it on a dish towel. Then, placed one sandwich in, flipped to coat and removed.

This step needs to happen fast because the peanut butter will melt out. I used a spatula in the left hand and tongs in the right. Flip with the left; insert and take out with the right. You get the picture.  You’ll figure out your own technique, and it’ll go very quickly. Once all your sandwiches have been dipped, let dry completely. 
At this stage, pull out your Betty Crocker Food Decorator pens. They work the best. It’s like food coloring in marker form.  They’re great! You will need red for this.  Now place little X’s in a backward parenthesis shape, and voila! You instantly have delicious, beautiful baseballs!


Let’s play ball, and Go White Sox! Kirby

Wednesday, April 27, 2011

A lot has happened since I started working on this particular post. We talk in just about every post about prepping your ingredients ahead. Well, I did just that. Wednesday night, I prepared my patties, so on Thursday I would just have to fire up the grill to get dinner going. Little did I know, that was not going to happen. I went into labor that night and our new addition arrived Thursday afternoon around noon. Since the burgers were already made, we grilled them the day I came home from the hospital.  I have since been a little sidetracked, but I’m back and trying to get caught up. I have posted a picture of our newest little blogger at the end. Enjoy…
Backyard Burgers
 There’s the smell of fresh cut grass in the air, the flowers are starting to bloom, and after a long winter, we all have the urge to break out the shorts and flip flips and get outside to grill! When you want to have a few friends over for an easy dinner, nothing beats a backyard burger. However, this post, we are going to put a little spin on things.
Because we are all still trying to hold on to those New Year’s resolutions, Lenten promises, or just trying to get in shape for the upcoming bathing suit season we are going to lighten up the typical backyard burger. We are having turkey burgers! Before you run away screaming about the horrors of diet food, stick around and give this one a chance. This recipe is from the Cooking Light magazine, July 2010. I LOVE this magazine. If you have never flipped through, I highly recommend it. You can find pretty much any recipe you desire in the pages of this magazine. The best part is that they have done all the work and lightened up the recipe. Double win!
This recipe in particular has a secret ingredient I will reveal towards the end. It promises to help the burgers taste more like the traditional beef we are used to. Stay tuned and see how they turn out.

Make your patties the night before and keep them in the fridge for a time-saver!
Light your grill and give it about 30-40 minutes until all the coals are white. This will ensure there is a pretty consistent temperature in the grill and also help prevent flame-ups.
While your grill is coming to temperature, mix together your ingredients and form large, loose patties. Try to handle them as little as possible. This helps to keep the meat tender. I tend to make my patties bigger and a little thinner than you would think. They tend to shrink up on the grill. If you don’t take this into account, you’ll end up with tasty little meatballs. We will soon find out if turkey shrinks like beef. Since turkey is so low in fat, we are going to lightly spray each side with a non-stick cooking spray so they don’t stick to the grill. (Note: Turkey does not shrink like beef on the grill.)


ALERT: Please, please, please, resist the urge to smash your burgers with the back of the spatula. This does not make your burger cook quicker. It can cause your burger to be dry and tough. Also, try to resist constant flipping. It is best to flip once during cooking.
For this particular burger, place on grill and let cook for about 4 minutes. Flip and cook for about 3 minutes on second side or until they are cooked through.
The burgers were very tasty; however, they did NOT taste like beef. They were full of flavor and I would definitely make them again. Are you ready for the secret ingredient? Roasted eggplant!  You roast it whole in the oven, puree, and mix in with the meat. It helps to hold it together while giving it added flavor and nutrients. Even if you think you don’t like eggplant, just try it. You won’t even know it’s there.  This recipe also calls for an ingredient called Marmite. I am not familiar with it and our local grocery stores do not carry it. Because it only called for ¼ teaspoon, I just left it out. I feel like the burgers were still very tasty.


This is what your roasted eggplant will look like.


Pureed Roasted Eggplant

**A burger is the perfect vehicle for many vegetables and condiments. My husband prefers the mushroom/swiss version.
**Sometimes when I have a little extra time on my hands, I make super thin patties; place a piece of cheese in the middle and top with another patty. Seal the edges and voila! Instant cheeseburger surprise.
Get out there and be creative with your toppings. Let us know which are your favorites!
-Anna

Our newest little blogger, Wade

Friday, April 22, 2011

And the winner is...

CARLA MOORE!!!! 

Carla wrote:
"We always have a "little kid" and a "big kid" egg hunt. I've moved up into the "big kid" category now. We hide eggs and let our children hunt them and then our parents hide eggs and let us hunt them. It gets pretty intense and I have never won, but that's okay because everyone gets a prize- even the one with the fewest eggs. Brooke Kinney is usually the winner and her stealth egg hunting skills can not be matched. I do enjoy the challenge and this year it's in MY yard, so I might have a chance... I love spending Easter with my family and friends!"

Congratulations, Carla!  Email us at everydayrecreations@gmail.com to claim your prize!  Thanks to everyone who entered.  Look for more freebies in the near future! Happy Easter everyone!

Tuesday, April 19, 2011

EASTER GIVEAWAY TIME!!!!


Leave a comment of your favorite Easter tradition, and you will be entered to win this Pampered Chef batter bowl (courtesy of Tiffany Walden) filled with Easter goodies!  Post by Thursday at midnight. Winner will be chosen and announced Friday morning.  Good luck!

P.S.  Check out Tiffany's Pampered Chef website here!

HOPPY EASTER!

Tuesday, April 5, 2011

King, er, Queen of the Grill

Palms are starting to sweat, getting anxious, nervous…
You know that feeling I’m talking about.  It’s how you feel when you get that first phone call that says, “Hey, you want to go to the (insert warm, watery destination) next month?”  You being the cool cucumber you are reply, “Of course! This is going to be so much fun!” You kindly say thank you and hang up.  That’s when it hits you….you have to put on a bathing suit soon. 
I'm wishing bathing suits looked a little bit more like this these days...
Your fully clothed wardrobe has to go back into its bins and placed safely in the barn. Oh, your closet is big enough to hold all your clothes at once? Well, aren’t you lucky! Back to my story.  Spring is in the air, and summer is around the corner.  Summer in the south wouldn’t be summer if lake and beach trips and afternoons spent at the pool weren’t there; therefore, it’s something you have to deal with.  Do you want to be the one sweating to death in your cover up, or the one proudly boasting your bathing suit bod? 
Let’s not panic just yet, we have a few weeks before it really hits.  This is the time that we stop eating all the comfort foods to warm us up from the inside.  Now is the time to bring out the grills and the salads! It’s time to stop trying to heat the house with the oven and move the party outside.  Are you with me? Less indoor cleaning…starting to sound a little better to you, huh?
You know what I’m thinking? Chicken!

The key to grilling the perfect chicken is all in the marinade.  You can marinate chicken for hours, and the longer it sits the better.  Two ingredients that I have in abundance right now are lemons and rosemary, so when I ran across Ina’s recipe for Tuscan Lemon Chicken I knew it’d be a hit. Plus, I love Ina.  I’m excited and my mouth is watering, so let’s get started!
First thing's first, let’s discuss our ingredients.  You’ll need chicken, lemons, rosemary, oil, S&P, garlic and large storage bags. I used pre-minced garlic in a jar, five lemons and about 4 Tbsp of rosemary. 

Your first step is to zest your lemons. I don’t have a zester (or a grater), so I used a vegetable peeler. It gets the job done, so no worries.  Then you need to squeeze your lemons. I hope you brought your guns because squeezing lemons is harder than I thought!  I got ¾ cup out of five lemons.  Now, chop up your rosemary. 

(The rosemary wasn't added until after these pictures.)
I apologize that I don’t have exact measurements for what I used. I was making a marinade, so it doesn’t have to be exact. I was also using bone in chicken breasts instead of whole chickens like Ina.  My pieces were too large to place in one bag, so I did three in one and three in the other.  Then, I did equal parts vegetable oil in each bag, probably about a cup, then divided my lemon juice equally among the bags, added salt and pepper in each, added about ½ tsp of garlic in each, then about 6-8 pieces of lemon skin and about 2 Tbsp of rosemary in each. Get things moving around and refrigerate overnight (or longer).

When you’re ready to start cooking your chicken the first thing is to preheat your grill. Once it’s good and hot add your chicken.  Large bone in chicken breasts cooked for 15 minutes on each side.  They were juicy and delicious!
I think technically you should start skin side down, but we didn't and they turned out great.


Yum. This meal was perfect.


Wednesday, March 23, 2011

Roll Out!


I.love.rolls. Actually, I love any kind of bread. I have a recording of my mother trying to get me to say "itty bitty peas" when I was a wee toddler and over and over--despite her perseverance--I would say, "Bread!" These thighs don't lie, y'all! Thus, when i found the Pioneer Woman's recipe for yeast rolls, I drooled and decided to give it a whirl. I've honestly never baked anything involving yeast because it seems a little...well...more time-consuming than I care spend on bread--especially when Sister Schubert does such an excellent job for me! But, hey, I'll try almost anything once! Who knows...it might become my "go to" bread recipe!

Wow. There are a lot of ingredients in this recipe, but most I already had from the days of my quest to make the perfect biscuit--except for yeast. And whole milk. The yeast I acquired from the sis (Thanks, Anna.). And I don't think I've ever in my whole life purchased whole milk (1% is my milk of choice), but that's no biggie. So, the original recipe makes like a million rolls, I think, so I decided to half the recipe. A million is just too much for my mill house kitchen to handle, but half a million I can handle. Ok so I exaggerate. Maybe it's just 24.

Here's the recipe halved:

2 c. whole milk
1 stick butter
½ c. sugar
2 ¼ t. active dry yeast
4 c. all-purpose flour
½ t. baking powder
½ t. baking soda
1 ½ t. salt
½ c. (additional) all-purpose flour
1 stick (additional) melted butter

Combine milk, 1 stick butter, and sugar in a large pot. Let it simmer until it’s almost boiling. Turn off the heat and let it cool for 30-45 mins, until mixture is slightly warmer than lukewarm.

Sprinkle in yeast and 4 c. flour. Stir to combine.

Cover and allow to rise for one hour.

After one hour, add baking powder, baking soda, salt, and additional ½ cup flour. Stir to combine.

Turn onto floured surface and knead for 8-10 minutes. Get ready for a workout.

I made my dough at night, and at this point covered it and put it in the fridge. During my lunch hour the next day, I rolled out the dough to ¼-½ inch thick (I discovered it works better if it’s thinner), and cut my dough with biscuit cutter (actually I just used a drinking glass) into circles.

Melt a stick of butter in the microwave. Dip rolls into butter, fold in half, and place on a greased cookie sheet. Press them down lightly to get them to seal.

They look like they're smiling at you!
Because I had to go back to work, I covered these in plastic wrap and popped them back in the fridge until I got home that evening. However, if you are ready to bake at this point, let them rise for about 30 minutes and put them in a 400 degree oven for 15 minutes.

I kind of whined a lot while I was making the dough for these rolls because it seemed like a lot of trouble to make something when I didn't know if it was going to turn out tasting like heaven or...poop. Luckily for me...these were wonderfully marvelous! I really was impressed with how well they turned out. And knowing that they are SO good, I think I will make these again. You can go so far as to make the dough, form the rolls, freeze them raw, pull out the number you want when you want them, let them thaw and rise on the pan, pop them in the oven, and EAT. That will save lots of time and energy. I will go out on a limb and say these are better than any rolls I've ever had. EVER. But I'm not bragging...it's just a great recipe. Try them. I ate 3 at dinner :)

In case you missed it the first time, here's the Pioneer Woman's full recipe if you'd like to see it: http://thepioneerwoman.com/cooking/2010/11/parker-house-rolls/

As always, if you have any questions or comments, feel free to email us at everydayrecreations@gmail.com or post a comment on this blog.  We love hearing from you!

Andie


Tuesday, March 8, 2011

Laissez les bons temps rouler!

Mardi Gras is a time of celebration in many cultures. The phrase, ‘Mardi Gras’, is French for Fat Tuesday. This ’Fat Tuesday’ refers to the last night of eating richer, fatty foods before the fasting of the Lenten season begins. The Lenten season lasts for 40 days (not including Sundays). Most of us attempt to rediscover those New Year’s resolutions we have left behind. Others attempt to truly ‘fast’ by giving up something very important to them, like chocolate or caffeine.
Now that the history lesson is over, let’s get to the good part. The food!!!
Each of the Everyday Girls chose a true Cajun or New Orleans inspired recipe. My mom made her famous Shrimp Creole, which can be found in the January 21st post. My choice was jambalaya. I love it, but have never attempted to make it. Every recipe I have come across has about 20 ingredients. When I see there are more than a handful of ingredients, I usually just try to find something easier. This time, I wanted a true classic. This particular recipe would be considered a ‘Creole Jambalaya’ because we are using tomatoes as part of the cooking liquid.
The only way I know to find a recipe that is true to its roots, is to find a true New Orleans resident and ask for the recipe. This recipe was sent to me from a college friend who grew up in Covington, LA just across the Pontchartrain. I have had the pleasure of visiting and dining on true Cajun favorites from this family. Love them!!
We talk about this every post, but this recipe, in particular, it is very important to prep your ingredients. Doing this will make everything so much easier when you are ready to begin cooking. All the veggies can be chopped the night before and stored in the fridge.
To see the full recipe, check under the recipes tab. Please note that I am posting the full recipe. I divided this in half and there was more than enough to feed 9 adults at lunch plus lots of leftovers.
1. Start by heating a large pot over med-high heat. Render the bacon and sausage with the butter, stirring occasionally to keep the bacon from sticking to the bottom of the pan. Season the chicken with salt and pepper and add it to the pot. Cook chicken about 5 min.

2. Add the onions, bell pepper, and celery to the pot and allow to cook for about 15 minutes. Add in the garlic and cook an additional 5 minutes.
3. Add all the spices and rice to the pot, stirring often for about 3 minutes.
4. Increase the heat to high, add the tomatoes and chicken stock. Bring to a boil, cover and reduce heat to simmer for about 15 minutes.
5. While the rice is cooking, season the shrimp with salt and pepper. Once the rice is done, turn off the heat. Stir in the green onions and shrimp, cover and the shrimp will cook in about 10 minutes. Remove lid, fluff, and serve.
This was so delightfully yummy, words cannot describe it. You are able to taste each element of the recipe; andouille sausage, bacon, chicken, and shrimp. The spice mixture was perfectly spicy without being overpowering. I loved it! However, if I were to make this again, I would take into account the large quantity even the half recipe makes

Kirby here. 
My Mardi Gras dish is a true classic; however, it might not be as difficult as you would expect.  I cooked beignets, and they were a hit!  Want to know the secret?  They were made from a box.  This goes to show that you can have a great Mardi Gras meal without having to go overboard.  Stephen said his mom made the best beignets, so naturally I wanted her recipe.  When word came back that they were prepared from a mix I was slightly hesitant. Then, I read through beignet recipes and saw where I would have to get yeast and let things rise…whoa! Stop right there! I don’t like my food moving around once it comes indoors, so let’s check out that mix a little more.
 When looking for this mix, I became slightly panicked because I couldn’t find it.  I was in one of the largest grocery stores in my area, and if they didn’t have it who would?!? My sweet, calm boyfriend suggested we try World Market.  Bingo! They had it, and at around 4 dollars, too. 

Ingredients: Mix, vegetable oil, water, powdered sugar
To make the batter mix 2 cups of mix with 7 ounces of water.  Put a few inches of oil in your pan and begin to warm this up.
 Now, bring out your flour; you’ll need lots because this is a very sticky batter. 
Flour your surface and your batter, bring together, and then start to roll this out.
Cut your dough into squares.

Drop them one by one into the oil, but no more than around 4 depending on the size of your pan.  Once you drop them in, they should rise to the top after a few seconds.
Flip them constantly until they are puffy and golden in color. 
Once you take them out of the oil, drain on paper towel and immediately coat in powdered sugar.  Since I was traveling with these, I stopped at this step.  We liberally coated them right before dessert!

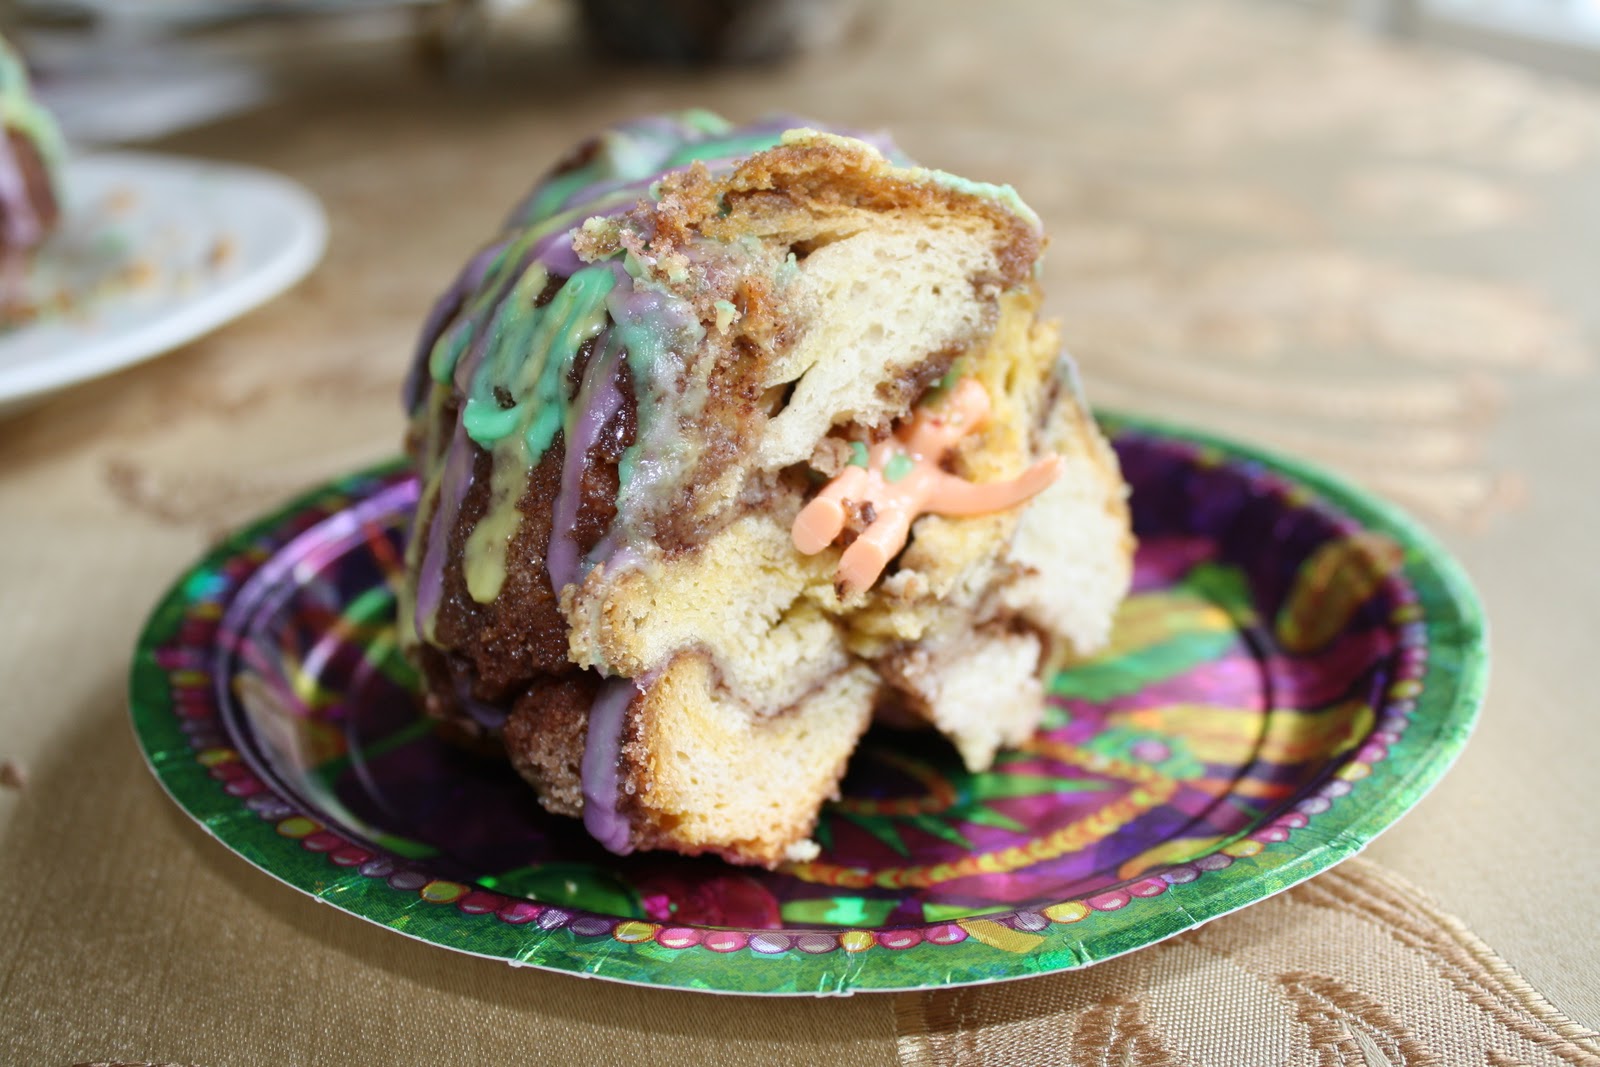
Check out pics of Andie's King Cake!  Her recipe will soon be posted! It's one that won't want to be missed!

Who found the baby?! Check back to find out!


Throw on your best Mardi Gras costume and Laissez les bons temps rouler!! (Let the good times roll!)